How to Use This Tier List
The right weapon can decide whether a raid ends with an extraction or an expensive loss. This Active Matter tier list favors guns that remain useful when monsters, armored Operatives, limited ammunition, and changing engagement ranges all collide.
A weapon’s raw damage is only part of its value. Strong picks should be controllable, practical to feed with ammunition, compatible with useful attachments, and replaceable often enough that losing one does not halt your progress.
These tiers are best treated as raid-planning guidance, not permanent fact. Balance updates, attachment availability, and your intended map can move a weapon up or down in practical value.
| Tier | What It Means | Best For |
|---|---|---|
| S | Excellent across several raid situations with manageable trade-offs | General PvPvE and valuable runs |
| A | Very strong, but more dependent on range, gear, or playstyle | Focused builds and experienced players |
| B | Reliable situational or budget options | Early progression and low-risk farming |
| Specialist | Powerful tools with narrow jobs | Specific objectives, maps, or squad roles |
Before following a ranking, consider these questions:
- Will most fights happen outdoors, indoors, or around extraction?
- Are you primarily expecting AI enemies, players, or both?
- Can you afford enough magazines, loose ammunition, and replacement gear?
- Does the weapon fit your preferred sightline and recoil control?
- Will a suppressor, optic, or larger magazine materially improve the build?
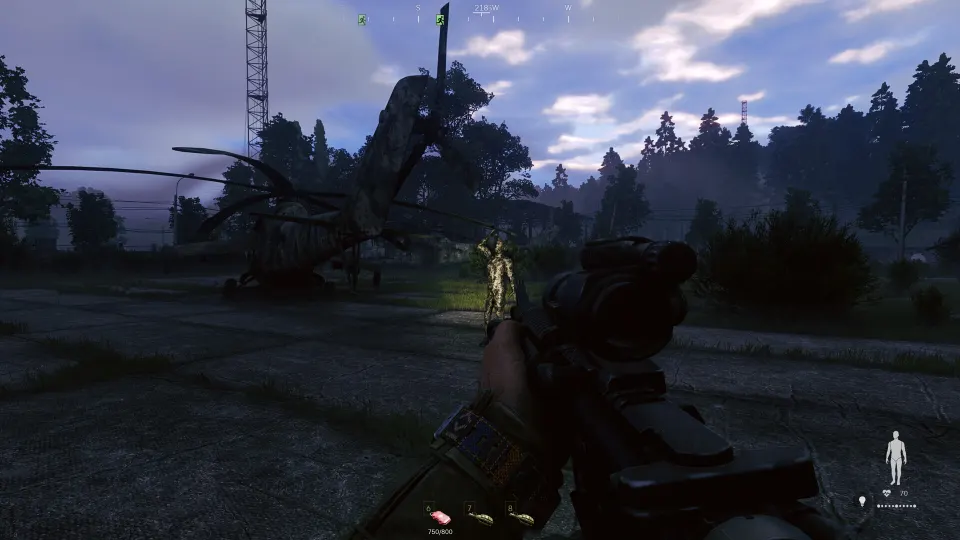
Active Matter Weapon Tier List
S-tier weapons earn their place through flexibility rather than one perfect statistic. An assault rifle that can clear a hallway, pressure a mid-range target, and accept useful attachments is usually safer than a powerful gun that only works in one scenario.
| Tier | Weapons | Why They Rank Here |
|---|---|---|
| S | M4A1, AR416A5, AEK-971, SCAR-H, M110A1, M39 EMR | Strong handling, reliable follow-up shots, useful range coverage, and high build potential |
| A | SCAR-L, AK-12, AK-103, M14, SVDM, AS VAL, VSS Vintorez, Origin-12, Scorpion EVO 3, PKM | Excellent in favorable conditions, with clearer cost, range, or recoil limitations |
| B | AK-74M, SOK-94 Vepr, MP5, UMP45, MAC-11, M249 Para, SV-98, M24, MB590, SPAS-12, DP-12 | Effective affordable or specialist choices that demand better positioning |
| Specialist | M82A1, RSh-12, RPG-7, Mosin rifles, flamethrower setups | High impact when deliberately selected, but poor universal choices |
The M4A1 is the most dependable all-purpose recommendation. It uses common 5.56 mm ammunition, has manageable recoil, and can shift from close-range optics to magnified sights depending on the route. It is especially useful once you can replace a lost rifle without damaging your entire economy.
The AR416A5 and AEK-971 reward aggressive automatic-rifle players. The AEK-971’s fast firing rate makes it dangerous in buildings and medium-range pushes, but it can burn through ammunition quickly. Use controlled bursts when targets are farther away instead of holding the trigger through every engagement.
For heavier rifle rounds, the SCAR-H offers deliberate, harder-hitting fire against protected targets. Its strength comes with a higher operating cost and less forgiving ammunition management. The SCAR-L is a more flexible 5.56 mm alternative for players who value steadier handling and suppressed builds.
M110A1 and M39 EMR are premier precision choices because semi-automatic fire gives you rapid, aimed follow-up shots. They work well for players who prefer controlled medium and long-range fights without committing to a slow bolt-action cycle.
Best Weapons by Combat Role
Your raid location matters more than a universal ranking. A close-range weapon can be top-tier in Downtown corridors and a liability on an open extraction route; a marksman rifle may reverse that result.
| Combat Role | Recommended Weapons | Strength | Main Caution |
|---|---|---|---|
| All-purpose raids | M4A1, AR416A5, SCAR-L | Covers mixed ranges and supports attachments | Requires sensible magazine management |
| Aggressive PvP | AEK-971, Scorpion EVO 3, Origin-12 | Fast pressure in rooms and short lanes | High ammo consumption or limited range |
| Heavy-target precision | SCAR-H, M110A1, M39 EMR, SVDM | Strong aimed shots and follow-up potential | More expensive ammo and slower movement |
| Budget PvE | SOK-94 Vepr, MP5, MB590, SPAS-12 | Low-risk and practical against common threats | Less reliable against protected opponents |
| Long sightlines | SV-98, M24, M82A1 | Strong opening shots and area control | Slow recovery if enemies close distance |
Shotguns deserve special attention in PvE-heavy raids. Monsters often force close engagements, making the MB590 and SPAS-12 dependable low-cost choices. Internal magazine shotguns also let you top off individual shells while moving, which can be safer than stopping for a full magazine reload.
The Origin-12 is the higher-end close-quarters option. Its semi-automatic action allows rapid follow-up shots when several threats push through the same door or stairwell. Bring it for confined spaces, but avoid treating it as your only answer when long outdoor sightlines are likely.
Submachine guns are similarly map-dependent. The MP5 is a comfortable learning weapon because of its low recoil and predictable handling. The Scorpion EVO 3 is more aggressive, while the MAC-11 can be devastating at point-blank range but empties magazines so quickly that every missed burst is costly.
Beginner and Budget Loadouts
New players should not rush into expensive rifles simply because they appear at the top of a tier list. A loadout is successful when it is strong enough for the objective and cheap enough to rebuild after a failed extraction.
| Loadout Goal | Primary Weapon | Supporting Gear | Why It Works |
|---|---|---|---|
| First mixed raids | M4A1 or AK-74M | Basic optic, several magazines, first aid | Teaches rifle range control without extreme recoil |
| Cheap PvE farming | MB590 or SOK-94 Vepr | Shells or spare magazines, light armor, medicine | Controls cost while handling common threats |
| Indoor exploration | MP5 or Scorpion EVO 3 | Red dot, spare ammunition, grenade | Fast target tracking in rooms and corridors |
| Careful mid-range raids | M39 EMR or M110A1 | Magnified optic, backup close-range weapon | Rewards patience and accurate follow-up shots |
| High-risk PvPvE | SCAR-H or M4A1 | Suppressor, quality armor, reserve ammunition | Provides flexible answers when raids become unpredictable |
A reliable beginner kit should include a primary weapon, enough ready ammunition for more than one encounter, basic healing, and open inventory capacity for loot. Do not fill every slot with hypothetical emergency items before entering the raid.
A small safe container is particularly valuable for protecting essential items. Keep the rest of the kit proportional to the raid’s likely reward. Premium armor around a disposable weapon can be poor economy, while weak protection on an important progression raid can be equally wasteful.
Grenades are useful but should serve a purpose. An F1 frag grenade can clear clustered AI, pressure enemies in tight rooms, and help with certain objective obstacles. For solo players, keeping one grenade for an extraction area can be more valuable than carrying excess ammunition.
Weapon Choice and Raid Preparation
The best choice changes as you progress. Early weapons are not automatically bad; they often provide the best learning environment because their replacement cost is manageable. The SOK-94 Vepr helps teach aimed semi-automatic fire, while the MB590 teaches spacing, corners, and timing between shots.
When upgrading, improve only the part of the build causing the problem. If you are losing close-range fights, consider an SMG or shotgun rather than buying a more expensive long-range rifle. If targets escape at distance, add an optic or shift toward an M110A1, M39 EMR, or SVDM.
Attachment choices should match the weapon’s role:
- Use red dots for quick target acquisition in close and mixed fights.
- Use magnified optics when controlling longer sightlines matters more than aim speed.
- Add suppressors to reduce unwanted attention during PvPvE routes.
- Favor grips and recoil-focused parts on fast automatic weapons.
- Avoid expensive attachments that do not solve a real weakness in your build.
Remember that armor placement protects the body regions where plates are physically installed. Your weapon choice, armor coverage, medicine, and inventory space are all part of one extraction plan. The goal is not simply to win a firefight; it is to leave alive with more value than you risked.
FAQ
What is the best all-around weapon in the Active Matter tier list?
The M4A1 is the safest overall recommendation because it combines manageable recoil, common ammunition, broad attachment support, and useful performance across close, medium, and open-range fights.
Which weapons are best for beginners?
M4A1, AK-74M, MP5, MB590, and SOK-94 Vepr are strong beginner choices. They are predictable, useful in clear combat roles, and generally easier to replace than premium weapons.
Are shotguns good in Active Matter?
Yes. Shotguns are highly effective against close-range AI threats and in tight interiors. The MB590 is a practical budget choice, the SPAS-12 offers improved capacity and cycling, and the Origin-12 is strong for repeated close engagements.
Should I always use an S-tier weapon?
No. Use the weapon that fits the map, objective, and budget. A B-tier shotgun can outperform a costly rifle inside a monster-filled building, while a precision rifle is more valuable on long, exposed sightlines.