Active Matter Map Overview
Knowing where a raid is likely to turn dangerous matters as much as choosing a weapon. Active Matter’s maps mix valuable loot, hostile creatures, rival operatives, and anomalies that can reshape the route you planned seconds earlier. Use this guide to compare locations before deploying.
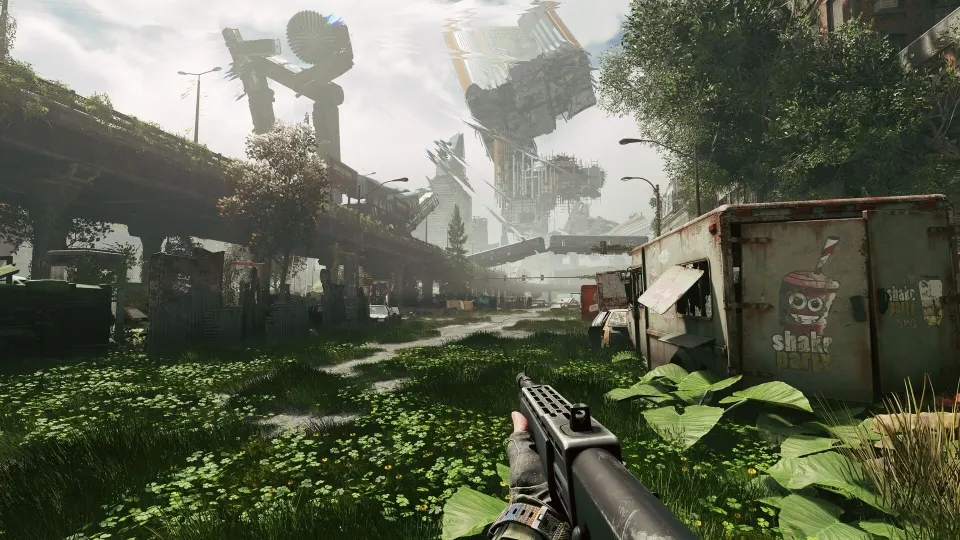
Most raids take place across Dalniy Island, a damaged landscape of industrial sites, towns, military installations, and research locations. The game also expands beyond conventional geography with spaces such as the Gigastructure, where gravity and layout are far less dependable.
| Map or location | Primary setting | What makes it distinct |
|---|---|---|
| Shegolskoe | Abandoned southern village | Gravity anomalies leave houses suspended above the ground. |
| Factory | Industrial complex | A relatively approachable option for learning extraction basics. |
| Cargo Port | Harbor and warehouses | Mid-level danger with varied enemies and frequent player contact. |
| Scrapyard | Dense industrial salvage site | Small, dark, and often contested by other operatives. |
| Military Base | Military compound | High PvP pressure and dangerous anomaly variants. |
| Headquarters | Ruined military city and airfield | Large-scale area with broad enemy variety and long travel distances. |
| Dam | Former island power facility | High-value gear is balanced by enclosed, risky interiors. |
| Park | Overgrown park and greenhouse complex | Home to plant-like threats and an abandoned laboratory. |
| Gigastructure | Shifting gravity-warped labyrinth | Routes, stairwells, and corridors can become disorienting quickly. |
A map is not always a fixed experience. Its base location can receive a variant that changes the creature population, lighting, anomaly mix, or overall raid rules. Check the deployment information before committing equipment you cannot afford to lose.
Choosing a Map for Your Experience
For a newer operative, the safest choice is usually a straightforward location with manageable navigation and fewer reasons for players to converge. Factory and Shegolskoe are commonly treated as easier starting points, though neither is harmless. Even a quiet raid can become deadly when another squad hears gunfire or an anomaly blocks an extraction route.
Cargo Port sits in the middle. It offers worthwhile loot and more enemy variety, but its warehouse lanes and harbor structures create opportunities for ambushes. Bring enough ammunition and healing supplies to deal with both creatures and players.
The most demanding locations reward preparation rather than bravado:
- Scrapyard is compact, dark, and prone to close-range fights.
- Military Base attracts PvP and can become especially punishing under its Silent Observer variant.
- Headquarters is expansive, enemy-dense, and harder to cross safely once a fight begins.
- Gigastructure challenges navigation itself; getting lost can be as costly as losing a firefight.
| Player goal | Good starting choice | Why |
|---|---|---|
| Learn extraction mechanics | Factory | Easier route planning and a lower-pressure environment. |
| Practice anomaly navigation | Shegolskoe | Floating buildings and portals introduce spatial hazards. |
| Seek balanced risk and loot | Cargo Port | More variety without the scale of Headquarters. |
| Hunt PvP encounters | Scrapyard or Military Base | Tight sightlines and contested areas increase contact. |
| Explore the toughest environments | Headquarters or Gigastructure | Broad threats, difficult movement, and demanding survival conditions. |
Open raids are PvPvE: other players can take your loot, while creatures and anomalies remain a constant threat. Isolated raids provide a PvE-only alternative for contracts, learning a route, or practicing combat. They can have less favorable high-tier loot opportunities, so the lower risk comes with a tradeoff.
Map Variants and Major Threats
Variants are not merely cosmetic labels. They can change which hazards dominate the map and therefore alter the equipment, route, and pace that make sense. A player who can handle a standard version of a location may still struggle when its featured threat becomes much more common.
| Variant or condition | Main danger | Practical response |
|---|---|---|
| Overgrowth | Larger concentrations of Flowermen and Dendroids | Avoid orange-flower areas, move quietly, and keep fire options available. |
| Silent Observer | Stone Sentinels already present in the area | Maintain line of sight, break contact behind cover, and carry grenades. |
| Hive | Flying insect swarms near nests or bodies | Get indoors when possible; avoid wasting ammunition in exposed areas. |
| Midnight | Very low visibility | Bring a flashlight and expect players to exploit darkness. |
| Distortion | Spatial and gravity-changing anomalies | Slow down around interiors and keep an alternate route in mind. |
| Unstable Zone | Closing play area and limited endgame extraction | Travel early, avoid unnecessary fights, and plan for a final confrontation. |
Overgrowth is particularly rough for inexperienced players because Flowermen appear in larger groups. Orange flowers are a useful warning sign; treat the surrounding area as hostile before you see the creatures themselves. Dendroids may also appear, but Flowermen are usually the bigger immediate concern.
Silent Observer Military Base is a major escalation. Stone Sentinels can rapidly close distance if you stop watching them, and they are dangerous to manage during a gunfight. Grenades are the most reliable answer if one must be destroyed, but escaping is often wiser than creating more noise.
Unstable Zone raids work differently from ordinary extraction missions. The playable area contracts after the raid begins, forcing surviving operatives toward the end. Extraction appears late, and competition for it can be intense. Enter only with a plan for movement, ammunition, and the possibility that another player is waiting at the exit.
Routes, Extraction, and Loot Planning
A successful raid is usually decided before the first valuable item enters your backpack. Pick a first destination, identify at least one nearby extraction, and keep a second option ready. Anomalies, hostile patrols, and rival players can make the shortest path unusable.
The island maps contain many recognizable points of interest, including lakeside neighborhoods, villas, a cargo harbor, factories, a power station, hangars, warehouses, residential blocks, and a greenhouse. These landmarks help with navigation, but they also pull players toward predictable loot routes.
| Map feature | Opportunity | Risk |
|---|---|---|
| Warehouses and hangars | Weapon cases, supplies, and cover | Multiple entrances make flanking easy. |
| Residential areas | Smaller loot stops and route connections | Close interiors can hide enemies or anomalies. |
| Administration buildings | Valuable rooms and mission-related areas | Locked doors may attract competing players. |
| Underground bunkers | Concentrated loot and enclosed combat | Limited exits make retreat difficult. |
| Floating buildings | Unusual loot positions | Usually require finding a nearby portal first. |
| Extraction points | Safe departure with recovered loot | Can be camped or become inaccessible during a fight. |
Follow a simple deployment routine:
- Check whether the raid is open, isolated, unstable, or affected by a variant.
- Mark a first loot target and two possible extraction routes.
- Decide what will make you leave: a full backpack, a valuable item, low medicine, or an injured teammate.
- Avoid prolonged fights unless they protect your route or offer a clear reward.
- Extract before the raid’s risk exceeds the value of what you are carrying.
Active matter itself is often found around anomalies, active-matter clusters, and defeated transformed creatures. It is valuable, but it naturally places players in dangerous areas. Do not assume an exposed cluster is free; another operative may be watching it, or the anomaly nearby may prevent a clean escape.
Portals deserve special attention on Shegolskoe and similar anomaly-heavy locations. A floating house may look unreachable from the street, but a portal in another nearby building can provide access. Learn these links in safer raids before relying on them while carrying expensive gear.
FAQ
What are the easiest maps for new players?
Factory and Shegolskoe are generally the most approachable choices. Factory is useful for learning basic raid flow, while Shegolskoe introduces portals and gravity effects without the broad pressure of Headquarters or Military Base.
Which Active Matter all maps location is hardest?
Headquarters is commonly one of the most difficult locations because it is large, crowded with enemy types, and demanding to navigate. Military Base can be similarly dangerous, especially under Silent Observer conditions.
Are Dam and Park worth visiting?
Yes. Dam can contain valuable gear inside its structure and administration areas, while Park offers greenhouse and laboratory exploration. Both require caution because their valuable areas can also concentrate threats.
What is an Unstable Zone?
An Unstable Zone is a battle-royale-style raid condition in which the playable area shrinks over time. Players must reposition toward a late extraction point, making the ending especially dangerous.
Can I learn maps without fighting other players?
Yes. Isolated raids provide PvE-only deployments, letting you practice routes, contracts, enemy behavior, and extraction timing. Open raids offer better chances at top-tier loot but add the threat of other operatives.