Why Map Knowledge Keeps Your Loot Safe
Knowing a map matters because a successful raid is not defined by how much you find—it is defined by what reaches your Shelter. Active Matter’s locations combine valuable loot, hostile creatures, anomalies, and extraction pressure, so a route without an exit plan can turn a great run into a loss.
Use each deployment to learn one practical thing: a safer approach to an objective, a building that offers cover, a common threat area, or a reliable path toward extraction. You do not need to clear every point of interest to make progress.
The official locations tour highlights five major raid environments: Gigastructure, Park, Shegolskoe, Dam, and Headquarters. Each rewards a different pace and awareness style.
| Location | Core identity | Main danger | Best mindset |
|---|---|---|---|
| Gigastructure | A shifting, gravity-distorted interior maze | Losing orientation, traps, close-range encounters | Move deliberately and remember your way back |
| Park | Overgrown green space with greenhouse areas | Flowermen, Dendroids, exposed approaches | Watch sightlines and avoid noisy fights |
| Shegolskoe | Abandoned southern village with floating structures | Anomalies and confusing vertical terrain | Check paths before committing to a route |
| Dam | Industrial dam and administration complex | High-risk loot areas and contested interiors | Loot efficiently, then leave before pressure builds |
| Headquarters | Large ruined military and urban zone | Turned Soldiers, monsters, long travel distances | Use cover and plan extraction early |
Map knowledge also helps you decide what gear deserves a slot. A close-range interior route may favor a shotgun and extra healing, while an open route benefits from range, cover awareness, and enough ammunition to disengage safely.
Read the Map Before You Move
Before leaving your spawn area, open the map and identify three things: your active objective, nearby threat zones, and possible extraction options. This takes seconds and prevents the common mistake of wandering toward loot without knowing where the raid will end.
Enemy information is available when selecting a raid, helping you prepare for the creatures likely to appear. Once deployed, marked enemy concentrations can help you choose whether to avoid an area or enter it with a clear purpose.
Follow this simple pre-route checklist:
- Find your nearest objective and choose a low-commitment approach.
- Mark an extraction direction before you start looting.
- Check whether your route passes through a dense enemy area or a major building.
- Leave inventory room for valuables and mission items.
- Reassess after a loud fight, injury, or a full backpack.
Do not treat every marker as mandatory. A loot container across the map may cost more ammunition, healing, and time than it returns. The best route is usually the one that connects an objective, a few useful loot spots, and an achievable exit.
| Map-reading priority | What to check | Why it matters |
|---|---|---|
| Objective | Investigation or assigned task location | Gives the raid a purpose beyond random looting |
| Spawn | Nearby cover, buildings, and enemy presence | Determines whether you should move quickly or stay quiet |
| Threat zones | Red indicators and known monster territory | Helps conserve supplies and avoid accidental fights |
| Extractions | Available exits and their relative direction | Prevents carrying valuable loot deeper into danger |
| Terrain | Doors, corridors, elevation, and open ground | Determines escape options when a fight begins |
When learning a new location, prioritize repeatable landmarks over exact loot claims. A dam administration building, greenhouse, airfield, or village edge is easier to recognize under pressure than a memorized container route.
Location Strategies and Threats
Gigastructure is the map where navigation itself becomes a threat. Its stairwells and corridors are designed to disorient you, and the layout’s gravitational instability makes a rushed retreat especially dangerous. Avoid sprinting blindly through unfamiliar branches. When entering a valuable room or side passage, make a mental note of the doorway, stairs, or distinctive feature that led you there.
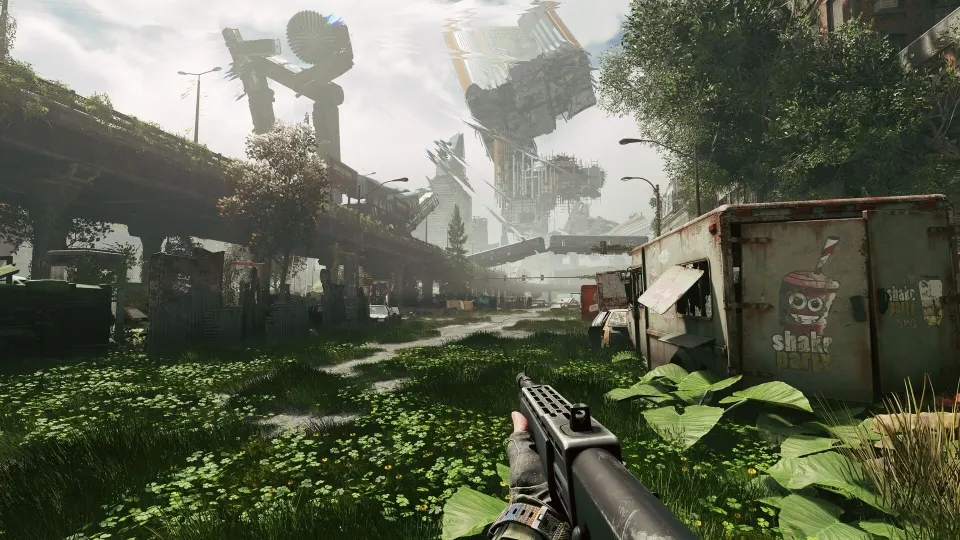
Park looks safer than it is. Vegetation, greenhouse spaces, and open approaches can hide Flowermen and Dendroids. Keep enough distance to respond, listen before pushing into dense areas, and avoid turning every PvE encounter into a prolonged gunfight. Its abandoned laboratory also makes the area feel like a meaningful destination, but that does not mean every raid needs a deep push.
Shegolskoe rewards careful footing. Gravitational anomalies have lifted parts of the village into the air, creating striking but hazardous terrain. Verify a route before crossing it, especially if you are carrying mission items or a full pack. The village edge can offer a more controlled way to reset a fight than forcing your way through the center.
| Location | Useful route habit | Threat response | Loot-and-exit rule |
|---|---|---|---|
| Gigastructure | Backtrack from recognizable landmarks | Avoid getting trapped in narrow routes | Leave once your bag has meaningful value |
| Park | Use open sightlines before entering foliage | Listen for creatures before shooting | Do not chase every enemy through vegetation |
| Shegolskoe | Confirm footing and vertical paths | Respect anomaly-heavy areas | Keep a simple route back to safer ground |
| Dam | Clear rooms methodically | Expect danger around valuable interiors | Do not linger after securing priority items |
| Headquarters | Travel between cover instead of open ground | Watch for armed Turned Soldiers | Save resources for the trip to extraction |
Dam is a high-value but high-commitment destination. Its interior spaces and administration building can tempt players into staying too long. Enter with a target: a contract, a required item, or a limited loot sweep. If you acquire valuable gear early, consider extracting rather than reinvesting that success into another risky fight.
Headquarters mixes military structures, civilian blocks, command areas, and an airfield. It is populated by Turned Soldiers and monsters, making it a demanding location for players who travel without cover. Move building to building when possible. The map’s scale means your medical supplies and ammunition must cover both the objective and the return journey.
Build Routes Around Extraction
Extraction is the conversion point between raid risk and actual progression. Equipment and loot left behind after death do not produce value, so leaving safely should influence every map decision.
Carry a kit that fits your planned route. Your weapon needs compatible ammunition, your armor should be in usable condition, and your medical supplies should be ready before deployment. The game’s pre-raid checks can flag ammunition, armor, and medical issues; take those warnings seriously.
A good beginner route has a modest goal. Complete one useful objective, loot along the way, then leave before the raid becomes a gamble. You can expand your route once you know how quickly a particular map drains your supplies.
| Raid stage | Player goal | Common mistake | Better choice |
|---|---|---|---|
| Preparation | Bring replaceable, functional equipment | Wearing every valuable item available | Use a kit you can afford to lose |
| First movement | Learn spawn and nearby cover | Running toward distant loot immediately | Read the map and pick a direction |
| Mid-raid | Complete objectives and collect value | Fighting every enemy encountered | Spend ammunition only when it helps |
| Full inventory | Protect the best items | Continuing to loot without a plan | Head toward extraction or use secure storage |
| Extraction | Turn loot into progression | Treating the exit as an afterthought | Reserve healing and a response for exit pressure |
The Robot Dog can be useful when you have accumulated more loot than your inventory can comfortably carry. It can hold items and be sent out of the anomalous zone, including mission-related items. However, it can be destroyed or lost if left exposed, so summon it with a purpose rather than treating it as a permanent companion.
A grenade can also be worth reserving for extraction. Enemy groups may occupy or approach an exit area, and one fast tool for creating space can matter more than another attachment or a few extra loose rounds.
FAQ
Which map should new players learn first?
Start with the location that supports your current objective and use short, repeatable routes. Park, Dam, and Headquarters each teach different skills, while Gigastructure is best approached slowly because navigation is part of the challenge.
Where is the best loot in Active Matter?
High-value items can appear in dangerous locations such as the Dam and its administration building, but “best” loot is only valuable if you can extract with it. Prioritize objectives, accessible containers, and routes that leave enough supplies for the return.
How do I avoid getting lost in Gigastructure?
Use recognizable landmarks, avoid taking multiple unplanned side passages, and periodically check your map. If you find valuable loot, leave through familiar territory instead of exploring deeper solely because you are already inside.
What should I check before deploying?
Confirm compatible ammunition, armor condition, healing supplies, inventory capacity, your selected objective, expected enemy types, and likely extraction direction. Those checks reduce avoidable raid failures.
What is the most important tip in an active matter map guide?
Plan your exit before you commit to loot. A smaller haul extracted consistently creates more progress than a risky full backpack that never reaches the Shelter.