Start With a Raid Plan, Not a Perfect Loadout
Active Matter rewards players who extract alive, not players who collect the most items before dying. A successful first raid turns loot, Active Matter, and objectives into Shelter progress, while an ambitious failed raid can cost the gear that funded it.
Treat every deployment as an investment. You spend ammunition, healing supplies, durability, time, and risk in exchange for materials, Credits, and Investigation progress. A small run that ends safely is usually better than a full backpack left behind after an avoidable fight.
Before queueing, choose one purpose. A clear goal stops you from wandering into dangerous areas simply because a container or gunshot sounds tempting.
| Raid goal | What to prioritize | When to leave |
|---|---|---|
| Learn a map | Landmarks, cover, routes, extraction points | After finding a reliable route and basic loot |
| Complete an Investigation | Required location, item, or target | Once the objective is complete |
| Build Credits | Portable valuables and low-risk containers | When the run can replace your kit |
| Practice combat | Affordable gear, cover, and exit routes | When supplies become limited |
Take the tutorial seriously. It introduces looting, hazards, combat, Active Matter, and extraction without the full pressure of a normal raid. More importantly, it teaches the habit of checking for an extraction route before you need one.
Your first kits should be replaceable. Do not enter empty-handed, but do not equip every premium weapon or attachment you own. Early raids are for learning ammunition use, enemy behavior, map flow, healing needs, and the real cost of staying too long.
Bring a practical minimum:
- A familiar weapon with compatible ammunition.
- Enough magazines or reserve rounds for several encounters.
- Repaired armor and a helmet when available.
- Healing supplies for after a fight, not just during one.
- Open inventory space for useful loot.
- One objective and a route toward extraction.
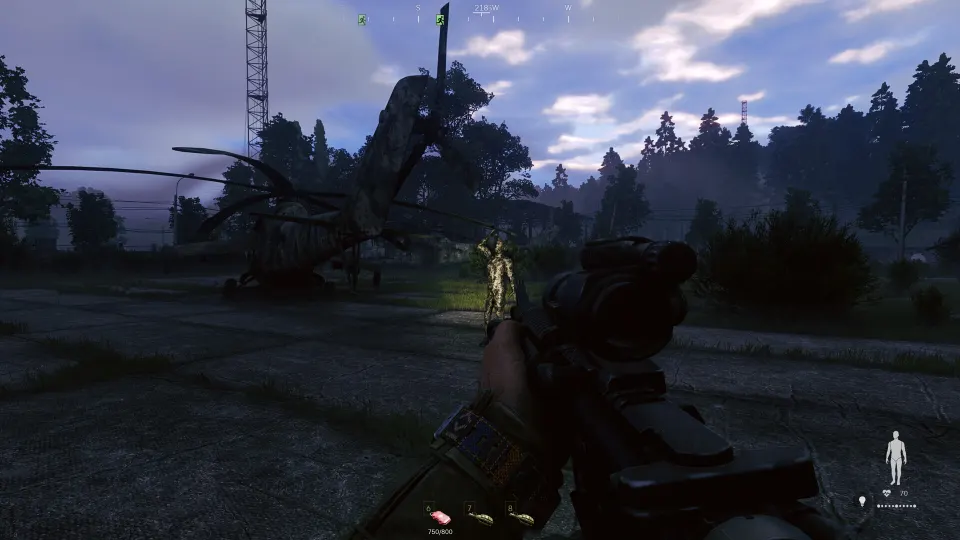
Build a Practical Kit and Inventory
An equipped weapon is not necessarily a ready weapon. Check ammunition type, magazine capacity, and reserve rounds before deployment. The pre-raid equipment checks can warn about missing ammunition, damaged protection, and weak medical preparation, so use them instead of clicking past them.
Armor condition matters as much as wearing armor. Damaged protection can create a false sense of security when an encounter becomes close-range or prolonged. Repair gear through the Shelter systems before trusting it in a raid.
Medical supplies deserve equal attention. Winning one fight does not make the area safe. You may need to recover, cross dangerous terrain, deal with a status problem, or survive another enemy while moving to extraction.
| Loadout part | Beginner priority | Common mistake |
|---|---|---|
| Primary weapon | Use a familiar, affordable gun | Risking an expensive weapon too early |
| Ammunition | Carry compatible rounds and a sensible reserve | Filling too much space with ammo |
| Armor | Repair it before deployment | Assuming equipped armor is fully effective |
| Medical supplies | Carry enough to recover after combat | Taking fights with no healing left |
| Pouch | Match it to expected supplies or loot | Ignoring category capacity bonuses |
| Attachments | Use only affordable, useful upgrades | Overspending before learning basics |
Pouches can make particular categories more efficient to carry. A medical-focused pouch suits players who value recovery supplies, while an ammunition-oriented pouch can support combat-heavy objectives. Choose based on the raid you are planning, not simply the highest-looking number.
Quick-access slots refer to items already in your inventory rather than creating extra storage. When an item is consumed, an identical replacement can be selected automatically. Configure those slots before entering so you are not searching through inventory during a fight.
Body Sleeves also influence early play. Their bonuses can improve healing, reduce weight penalties, help identify items, expand ammunition storage, or support close-range resistance. There is no single mandatory choice: pick the benefit that fixes your biggest problem. Healing is forgiving for cautious newcomers, while reduced weight penalties help players who frequently overfill their bags.
Choose a Raid Type and Move With Purpose
Open raids combine PvP and PvE pressure. Isolated raids focus on PvE and are useful for learning routes, completing Investigations, and understanding hostile AI without treating every noise as a player ambush.
Some maps and raid options rotate in availability. If a PvP destination is unavailable, its PvE version may still allow access for related objectives. Quick raids are useful for immediate deployment, but direct map selection is better when an Investigation requires a particular place.
| Mode or option | Best use | Watch for |
|---|---|---|
| Isolated raid | Learning maps and finishing objectives | Environmental threats still matter |
| Open raid | PvP experience and contested loot | Players can interrupt any plan |
| Solo matchmaking | One-on-one player encounters | AI and hazards remain dangerous |
| Team matchmaking | Coordinated fights and information | Communication affects survival |
| Team-only queue | Players prepared for squad activity | Solo players can face organized groups |
| Unstable-area raid | Fast, battle-royale-like action | Short limits and fewer objectives |
When you spawn, pause briefly. Find nearby cover, note the objective direction, consider likely enemy routes, and review extraction information. Moving immediately without reading the area is an easy way to enter a fight you did not need.
Sound is valuable information. Heavy gunfire can reveal where teams are fighting, letting you avoid them or approach carefully for contested loot. In team-focused queues, loud groups clearing AI can make their locations obvious. That can create an opening for a solo player, but only if you have a route away afterward.
Do not assume every encounter deserves a fight. Fight when an enemy blocks an objective, guards a worthwhile route, or threatens your extraction. If you already have the item you needed, leaving can be stronger than proving you can win another exchange.
Loot, Hazards, and Extraction Create Progress
Loot matters only after it reaches the Shelter. Dying can cost weapons and equipment that are not protected, so extraction should influence every decision from the start of the raid.
Pick up useful resources while learning what items do, then become selective. Inventory capacity is a resource. A bulky low-value item can prevent you from carrying medicine, quest materials, ammunition, or compact valuables that would better support the next deployment.
Active Matter is central to the progression loop. Bring it home to support crafting-related systems or convert it into economic value. Processing loot, selling items, refining materials, replicating equipment, and completing Investigations all strengthen later raids.
| Situation | Best beginner response | Why it works |
|---|---|---|
| Valuable loot appears early | Consider extracting sooner | Protects a profitable raid |
| Healing is nearly gone | Avoid optional fights and head out | One extra fight can erase progress |
| Inventory is full | Compare value, size, and quest need | Preserves room for better rewards |
| Crystal-marked anomaly wall | Use it carefully as traversal | It may reach difficult areas |
| Gravity trap ahead | Trigger it at range with a thrown item | Reduces danger and saves ammunition |
| Extraction activates | Watch approaches and use cover | Threats can still interrupt the exit |
Anomalies are not always simple obstacles. Crystal-marked surfaces can indicate a traversal opportunity, opening routes that would otherwise be inaccessible. Test unfamiliar anomalies carefully; a shortcut is not valuable if it leaves you exposed or trapped.
Extraction is not the moment to relax. Follow its marker, including vertical guidance when the point is above or below your current level. After activation, watch nearby approaches instead of staring at the timer. You may be able to use nearby cover rather than standing directly beside the extraction point.
After returning to the Shelter, review the raid. Check which supplies were consumed, which loot mattered, whether the kit was too expensive, and what blocked your objective. Improve one part of the next loadout instead of changing everything at once.
FAQ
What is the best first goal in Active Matter?
Complete a simple Investigation or learn one map while extracting with basic loot. That teaches the full raid loop without requiring a risky PvP victory.
Should beginners play PvE or PvP?
Start with Isolated PvE raids if you need to learn controls, AI, maps, and extraction routes. Try Open raids when you can afford to lose a kit and want player encounters.
How much gear should I risk?
Bring enough gear to complete the objective and survive a short fight, but use equipment you can replace. A functional affordable kit is better for learning than an empty loadout or an irreplaceable premium one.
Why should I extract early?
Extraction secures loot, Active Matter, and progress. Leave when the objective is complete, your bag has useful value, or your healing and ammunition are running low.
What should I remember from this active matter beginner guide?
Prepare ammunition, repaired armor, healing, and inventory space; set a clear objective; avoid unnecessary fights; and extract once the raid is profitable.